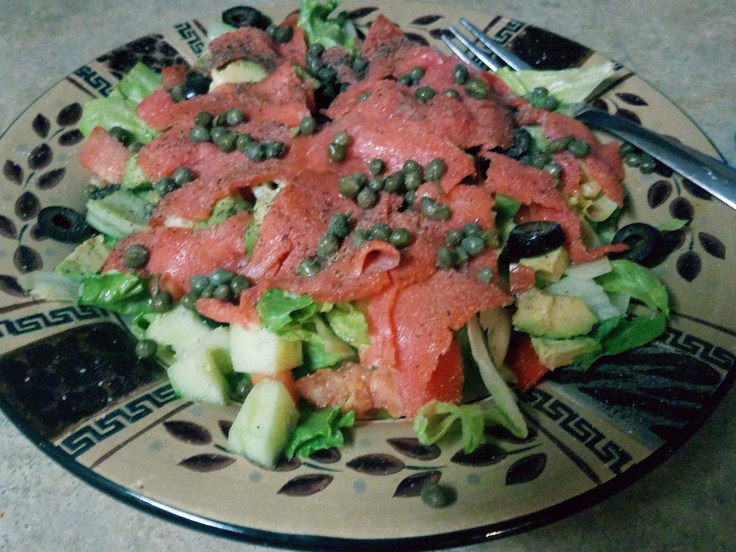
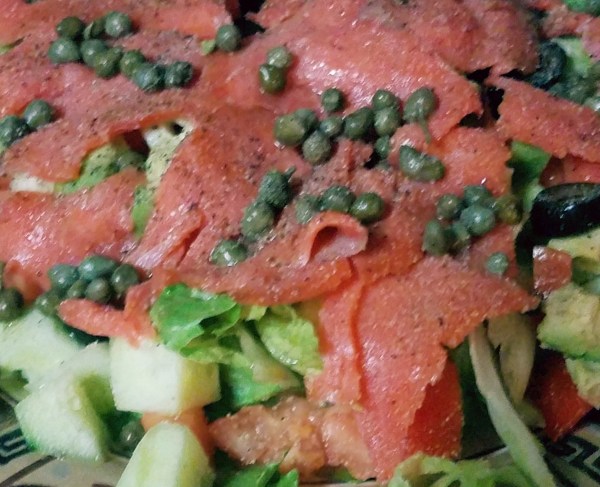
Ingredients:
1 small pack of smoked sockeye salmon
Lettuce
Tomato
1/2 of Avocado
Capers
Cucumber
Black olives
*Lightly season on top with 👇🏽
Olive oil
Red wine vinegar
Mirin
Sea salt
Black pepper
Garlic powder
And you’re done!
Enjoy a moment or two
Ingredients:
1 small pack of smoked sockeye salmon
Lettuce
Tomato
1/2 of Avocado
Capers
Cucumber
Black olives
*Lightly season on top with 👇🏽
Olive oil
Red wine vinegar
Mirin
Sea salt
Black pepper
Garlic powder
And you’re done!

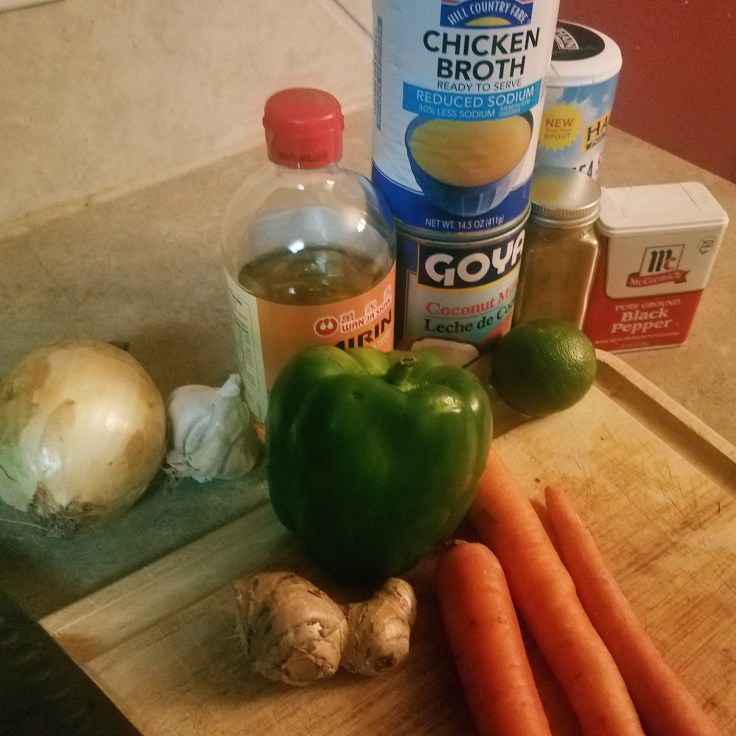
As a single mom I work ALOT. I mean… these bills aren’t going to pay themselves but to me it is still no excuse to not cook for your family. Dinnertime is a time where me and my kids discuss our day. We bond and learn more about each other. Having a healthy open dialogue with my children is very important to me. Also the time and effort I put into making them nutritious and delicious meals is very much appreciated. It is a physical display of my love that I can give almost everyday. However, I am not superwoman and sometimes my energy gets low. For those days, I have a number of quick meals in my mental Rolodex that I can throw together. I just make sure I keep raw materials in my house at all times. One of my staple ingredients in the pantry is coconut milk. Yes… coconut milk. It takes your meal from basic to blazing!! With that said, here’s how I make a super quick…
Coconut Curry Chicken
Ingredients:
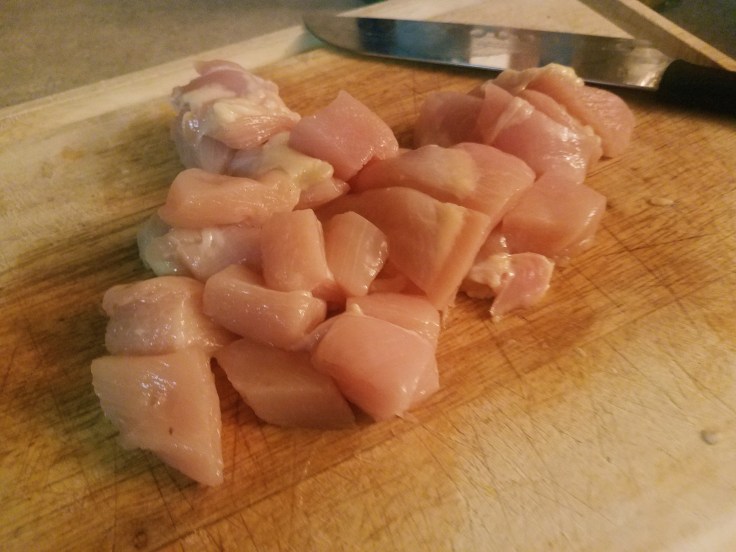
2 lbs of chicken breast cut in one inch cubes
1 can of chicken broth
1/2 cup of Mirin
1/2 cup of coconut milk
2 tablespoons of curry powder
1 onion chopped
Juice from 1 lime
4 cloves of garlic chopped
2 tablespoons ginger root chopped
3 carrots sliced
Sea salt and black pepper to taste
Vegetable oil to saute
*For heat add 1 chopped jalapeño or a 1/2 tablespoon of chili paste
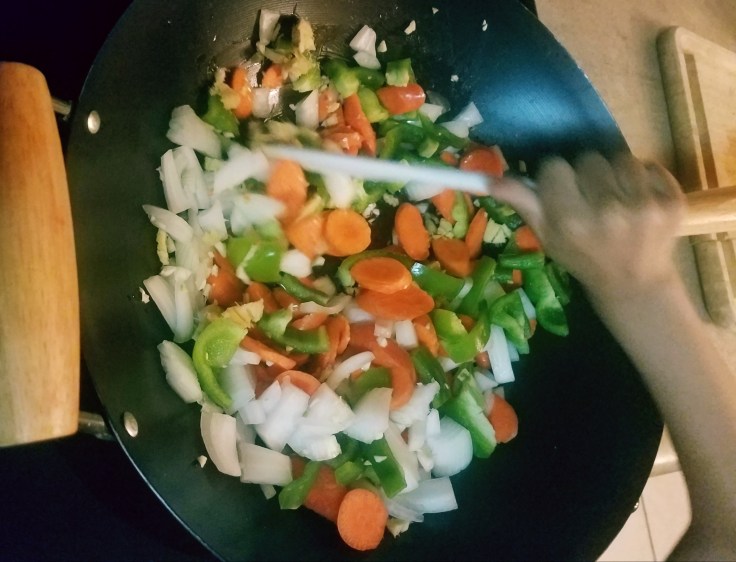
On medium heat begin to saute with vegetable oil all of the chopped vegetables including garlic and ginger in a large wok. Add a little salt, pepper and stir. I typically will start my veggies first to give the carrots enough cooking time to soften. Rocco decided to be a big helper that night and his stir-fry skills are pretty good! Lol. He stirred while I was cutting up the chicken.
Next take your chicken that you have cut into cubes and add them into the pan with the veggies. Begin tossing them so that the flavors begin crossing. The smell of fresh garlic and ginger “getting into the chicken” is like no other!
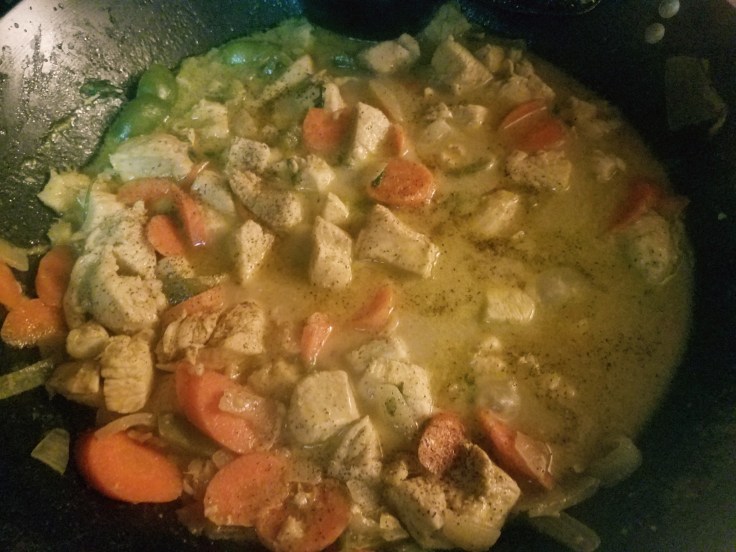
Add Mirin, curry powder, chicken broth, and coconut milk. Add more salt and pepper to taste. Squeeze in the fresh lime juice. Stir occasionally. Allow it to simmer 20-25 mins. When the chicken is cooked through it is ready to eat. The reason the cooking time is reduced significantly is because we don’t have potatoes as the starch typically found in curry dishes.
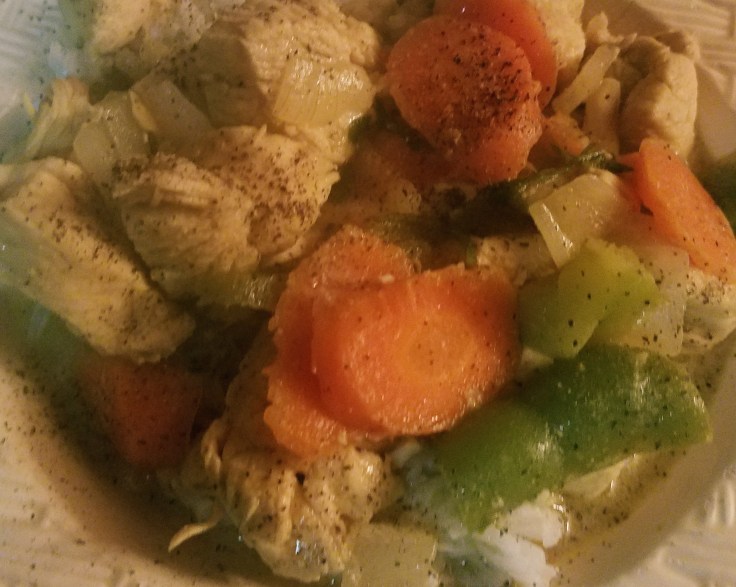
Serve with rice.
Now I’m a country girl born and raised in Newport News, Virginia. Southern food is one of my favorites but I can’t eat it all the time. I consider me eating it a cheat day basically. A treat! Even a delicacy. I daydream of calorie heavy fried food! Grease! Oil! Salty! Hot sauce! FAT!!! Organ meat!!!
Man…I love my fried giblets, livers, and hearts. Typically make them only for myself and make the kids a different meal just because organ meat is an acquired taste. When I’m super desperate, I’ll stop at Bush’s chicken in a heartbeat to pick some up and kill my southern craving. Last night I wanted to see if I could get the kids to eat them and I came up with a way to disguise them. I learned with kids you can get them to eat just about anything just don’t tell them what it is. Because I swear once they know, there is this immediate wall they throw up where they start judging before they even taste it. I kept them out of the kitchen and told them I was making chicken with a special sauce. I hid the meat in the frig so no heads up. They just went about their lives playing video games and paid me no mind.
“Just the let us know when it’s ready.”
“Cool…”
Welp… no because there was complications with the meal. I’ll get to that later…
Chicken Hearts and Giblets in a Red Pepper Sauce
Ingredients:
Meat:
1 lb of chicken giblets cut in smaller cubes
1 lb of chicken hearts
Seasoning salt, garlic powder and black pepper
2 eggs and flour to batter
vegetable oil to deep fry
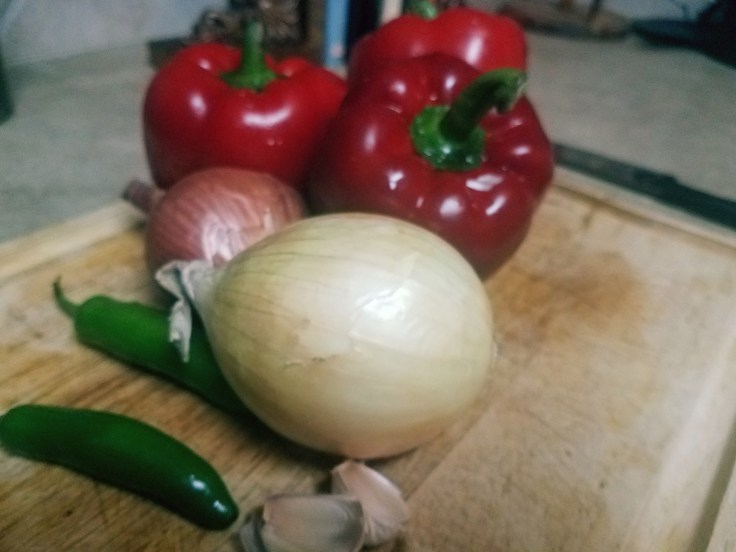
Red Bell Pepper Sauce:
3 red bell peppers sliced
1 lime
4 cloves of garlic chopped
1 whole onion chopped
2 serrano peppers chopped
1/2 cup of red wine
1 teaspoon of cumin
2 tablespoons of soy sauce
1/2 cup of chicken broth
sea salt and black pepper to taste
Vegetable Side:
Frozen stir-fry mixed vegetables
sea salt, garlic powder and black pepper to taste
vegetable oil to sautee
1/2 stick of butter
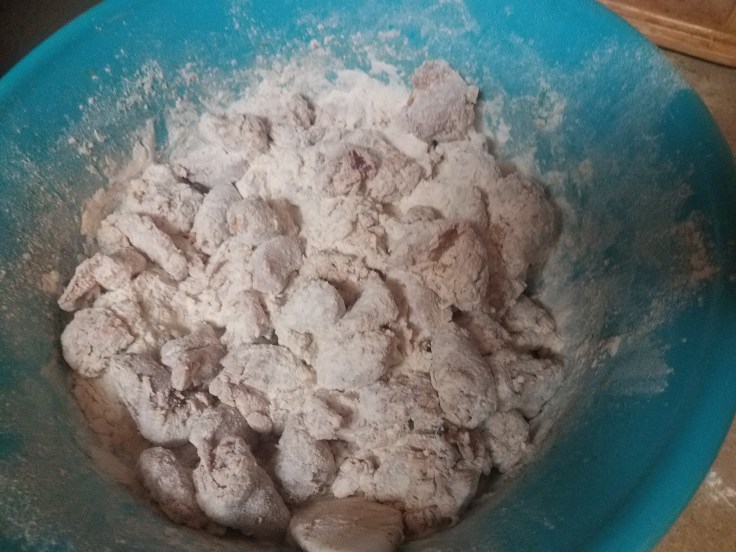
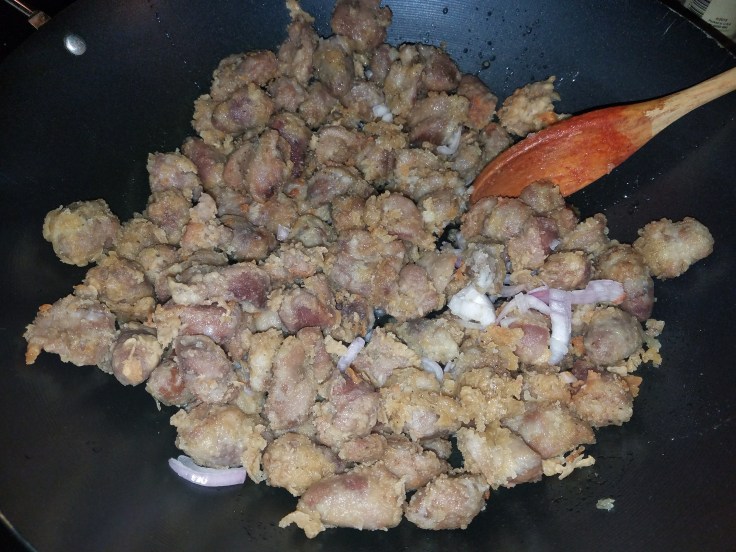
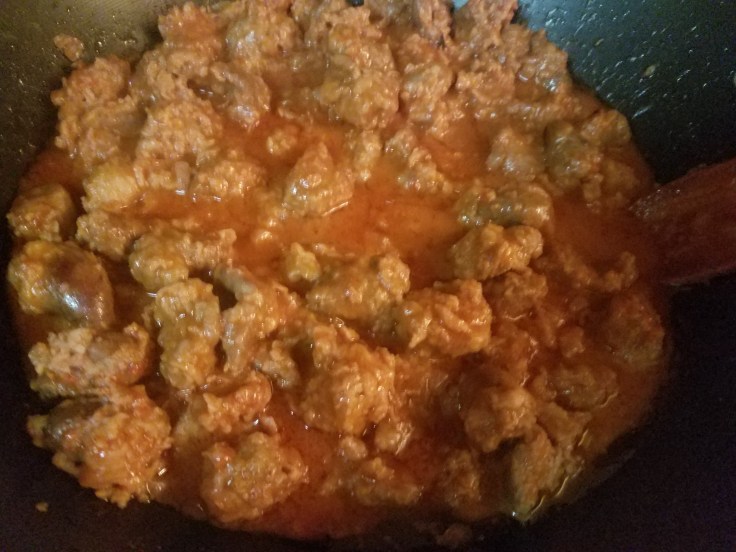
First I sliced the giblets into smaller pieces to make them easier to chew. Put the hearts and giblets in a large bowl and crack the two eggs into the bowl. Mix them around to coat the meat in egg. Then season liberally with the seasoning salt, garlic powder and black pepper. Then toss the meat with flour until well coated. Heat up a medium sauce pan with a lot of vegetable oil. Deep fry the meat until a golden brown color. Make sure to rotate the meat so each side is cooked thoroughly. Using a strainer spoon ladle scoop out the meat and place onto a plate covered with a paper towel to remove excess oil. Then place this meat into a larger wok with chopped scallions and set aside.

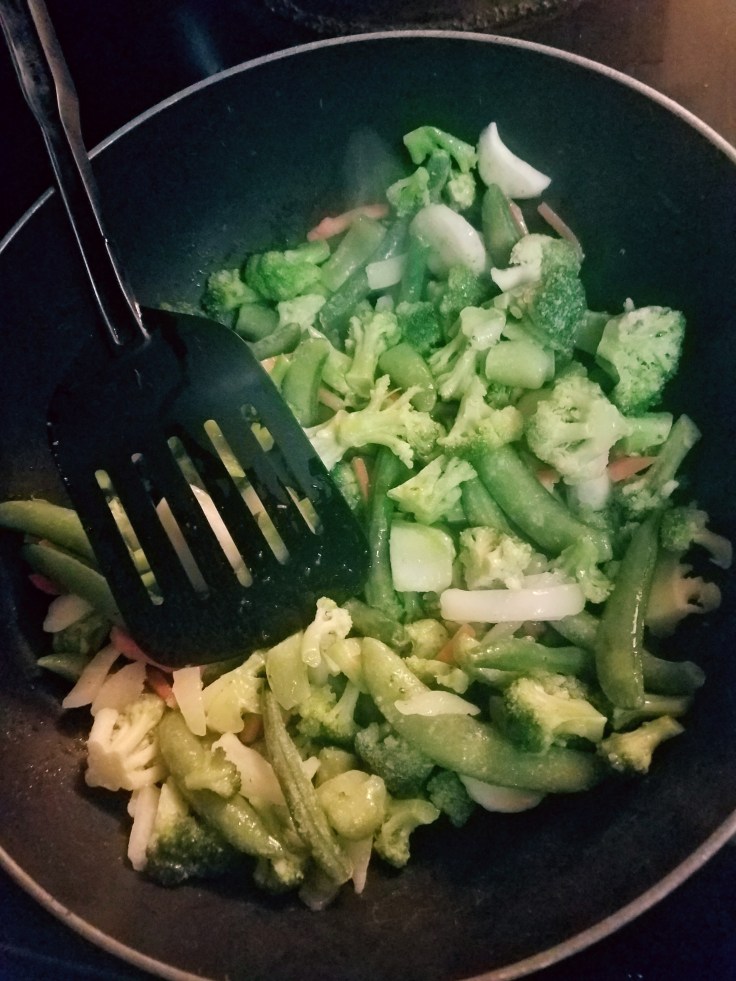
Now for the vegetable side. I simply sauteed the frozen mix in a little vegetable oil and season with sea salt, garlic powder, butter and black pepper to taste on medium heat. This takes about 15-20 min and turn down on a low heat to keep warm.
Lastly…. ugh the Red Pepper sauce. The original way to make this sauce was to put all the vegetables, wine and chicken broth into a blender or food processor until it becomes a smooth mixture. What happened last night was both my blender and my food processor STOPPED working. They straight broke on me y’all!!! OMG I was so livid especially after getting this far! I was ready to give up until I remembered I do have a juicer? A juicer!
It had the thickest layer of dust on it. I was scrubbing it down freaking fuming! Like what the heck is this sauce even gonna be at this point? I was like if this doesn’t work. I’m just gonna order a pizza for the kids and what I made so far, eat myself.
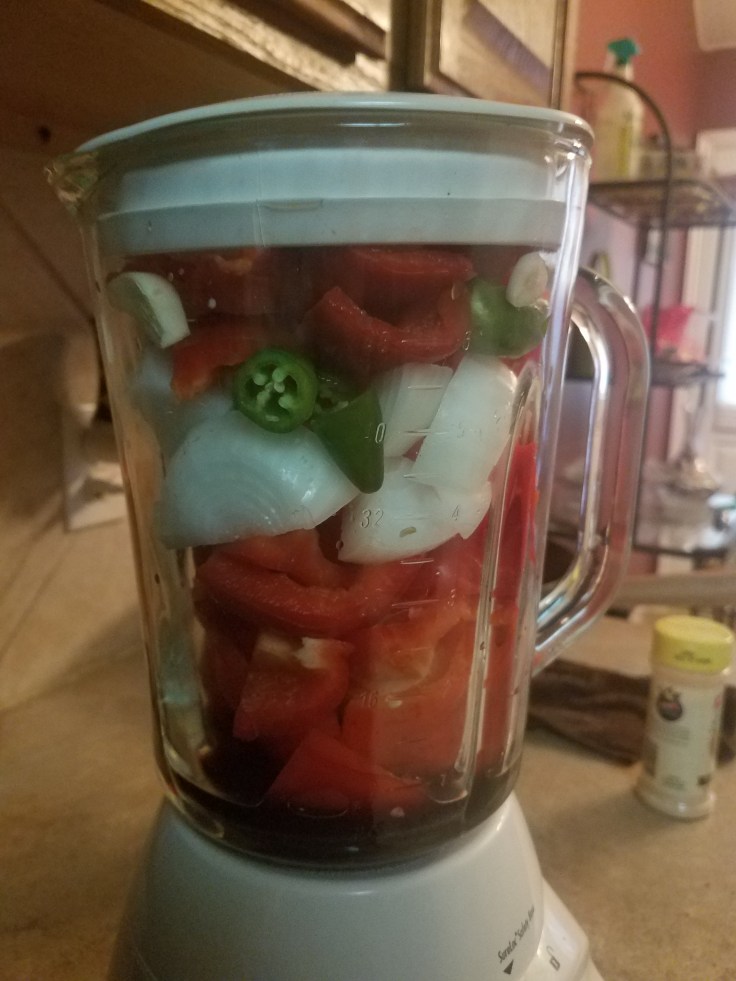
I juiced all the vegetables and put the mixture in a bowl. Ugh the dang juicer…

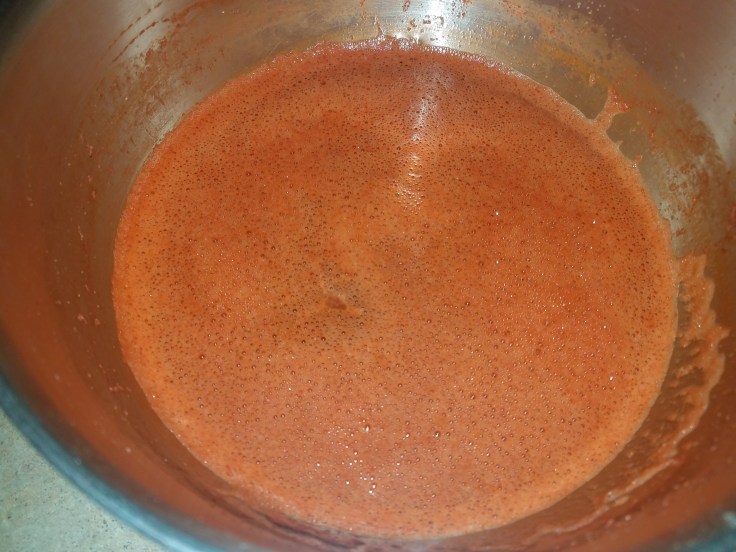
All the juice was collected and poured into a bowl. Then added red wine, cumin, soy sauce, chicken broth, sea salt and pepper to taste. Stir the mixture. It was a thinner consistency as to be expected. But also as an FYI the heat from the serrano peppers was lost. Using a food processor you will be able to get the heat from the peppers. So if you have terrible luck like me you can add some chopped serranos or jalapeños. Lol… say if you are using a juicer. Ugh!
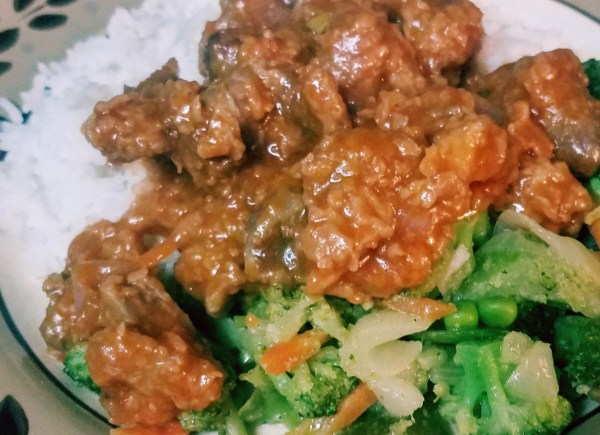
Next I added just a bit of vegetable oil and the juice into the wok with the meat. Put it on medium heat and stir it up. Let it simmer for around 15 mins.
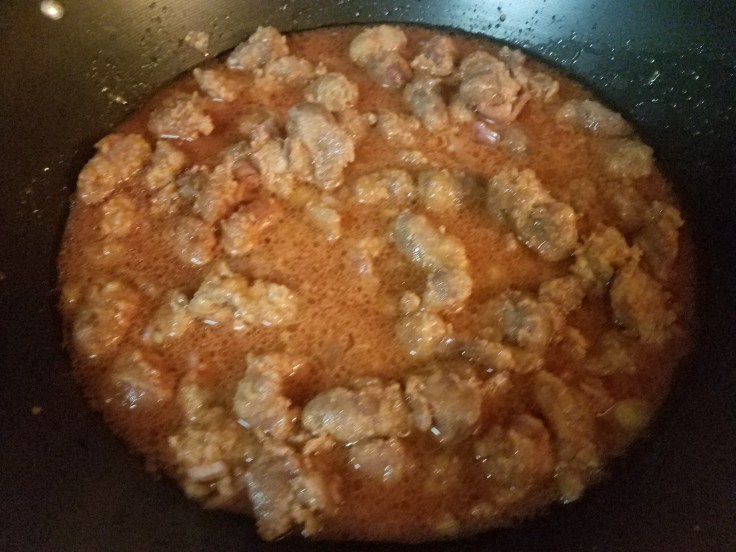
Now I was very surprised with the outcome. The sauce thickened and coated the meat very nicely! Like wow! I tasted it and it was a winner! The only difference was a thinner less spicy sauce. But it was still very good as the past times I’ve made it. So this is the perfect example of not giving up on a dish. Think outside the box to get it done!
My kids loved it! (it being organ meat and all) and my eldest son’s only issue was…
“You said that this sauce has serrano peppers? My question is where are they?” LOL!
He needs to be a judge on Chopped I swear!


Baking bread is like the oldest trick in the book. For some crazy reason in our technology driven age it has become as elusive as finding the Leviathan. Not that one would want to find this deep sea creature cause surviving the meeting has even less odds. Yet here we are with countless epic fail stories and people resorting to buying expensive equipment to do it for them.
As a young child I used to watch my father fail over and over again to make bread. The horror of burnt loaves! Imagine the despair of a super intelligent man who could work on submarines get served defeat time after time from a little ol’ loaf of malformed bread. I even told him why even bother they sell it in the stores. Just go buy it! Welp, after dang near the 25th time the bread finally came out right and it was well okay. Yeah…. just okay. It was nothing amazing or worth my tastebuds to remember. However, I feel I have redeemed our family name in regards to baking. I realized I could not overthink think the process. Remember people been making bread before we had blenders, food processors and that dang Breadmaker!! I believe the trick is allowing the time for the bread to rise and adding a Dutch oven to your kitchen arsenal.
My Italian Herb Garlic Bread
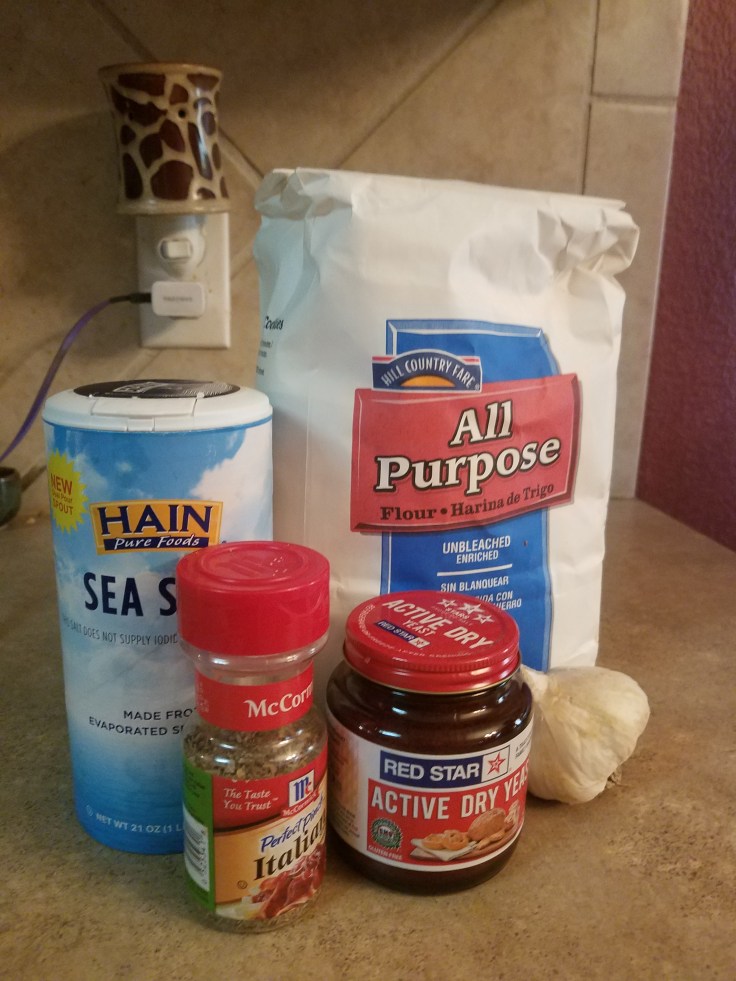
Ingredients:
3 cups of flour
2 teaspoons sea salt
1/2 teaspoon Active Dry Yeast
1 Tablespoon of McCormick® Perfect Pinch® Italian Seasoning
4 cloves of garlic chopped
1 1/2 cup of warm water
**Replacing your Breadmaker Equipment:
5-7 quart Enamel Coated Dutch Oven (I got mine from Walmart)
Mix all the ingredients in a large mixing bowl. It’s gonna stick together but look really stringy and messy. This is okay. You’re not looking for uniformity or a smooth beaten mixture. In fact don’t over mix the dough or the bread wont be as fluffy.
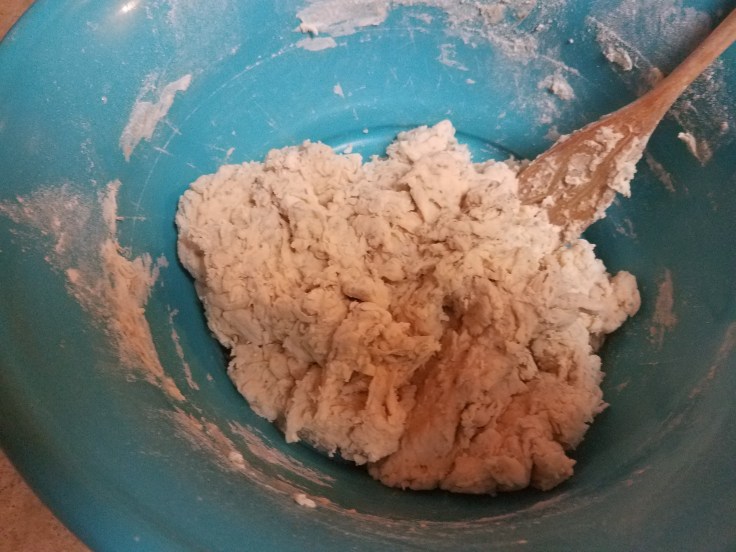
Your final mixed ratchet-looking dough is below. Remember, it will come together less is more.
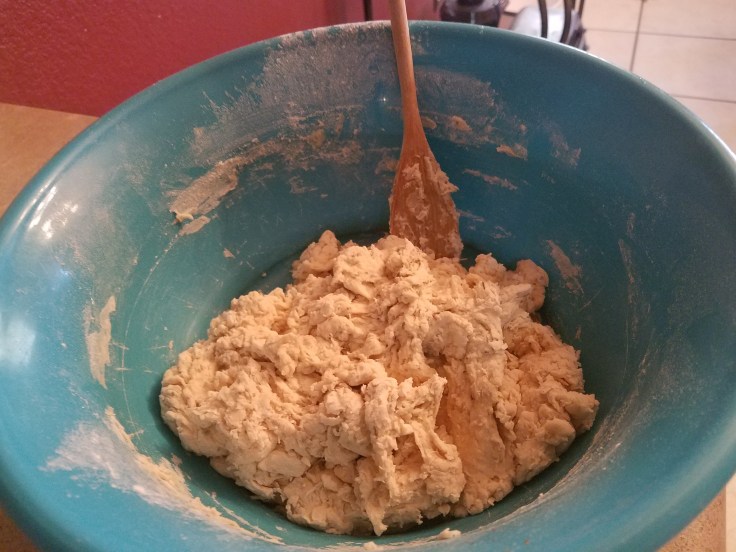
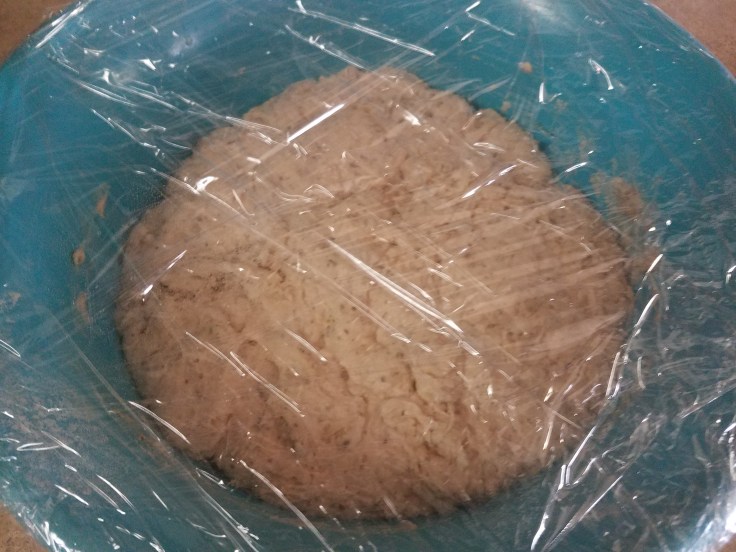
Cover it with plastic wrap or a damp cloth for at least 8 hours at room temperature. I typically prep this a day before so I can bake for the next nights dinner.

After 8 hours your dough will have risen and will look like this. You will see nice little air pockets!! Super cool!
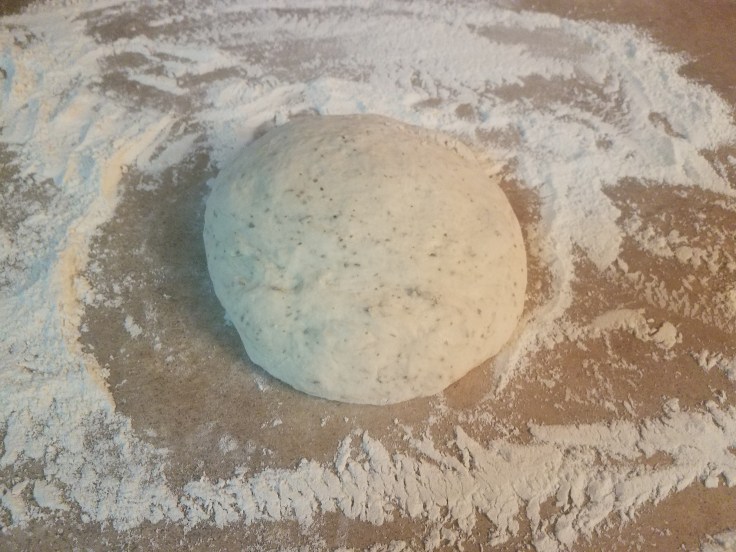
Preheat your oven 450 degrees. While it is heating up put some flour on a flat surface and powder your hands so the dough doesn’t stick to them. Dig the dough out the bowl and then punch it a few times.
Hee hee…
Ahem, yes… punch it a bit. Then shape it into a nice ball like this.
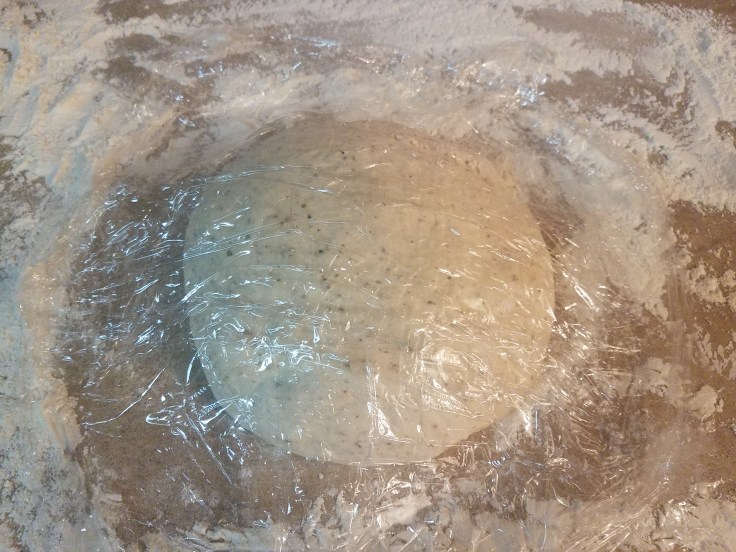
Cover the dough with the plastic wrap until the oven is heated and ready.
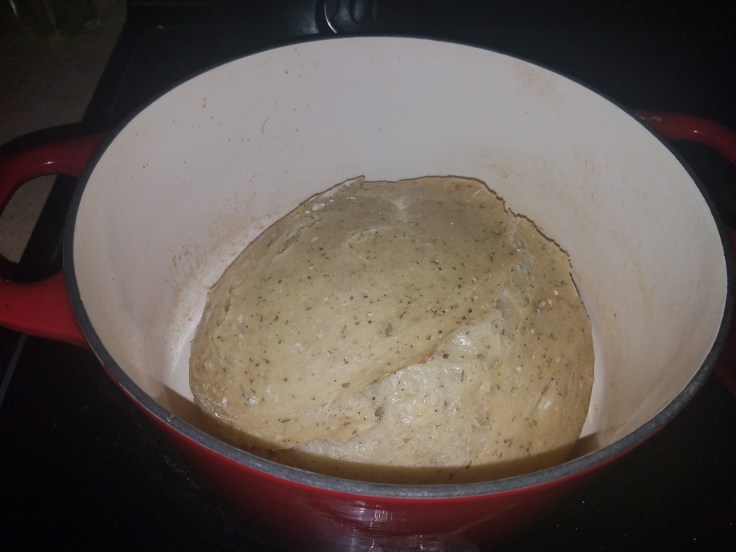
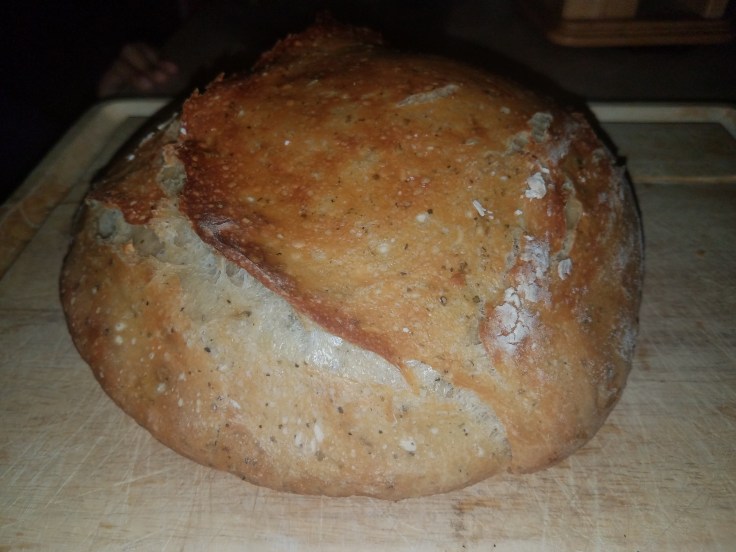
You will put the bread AS IS in the Dutch oven. The dough shouldn’t stick to the enamel so you don’t have to line with oil or whatever. If you are not using a non-stick oven then add olive oil or parchment paper on the bottom of the pot. Bake for 30 minutes COVERED. Then REMOVE the top and put it back in the oven. Mine looked like this after 30 minutes.
***PAY ATTENTION***
Now…this is the final stretch for you. Depending on your oven it may take roughly 7-15 minutes to get that golden color. I set my oven timer on 7 mins initially. Checked it. Nope! 3 mins more. Nope and finally 3 mins again. Yes it’s perfect!
Remove it from the pot on to a cutting board.
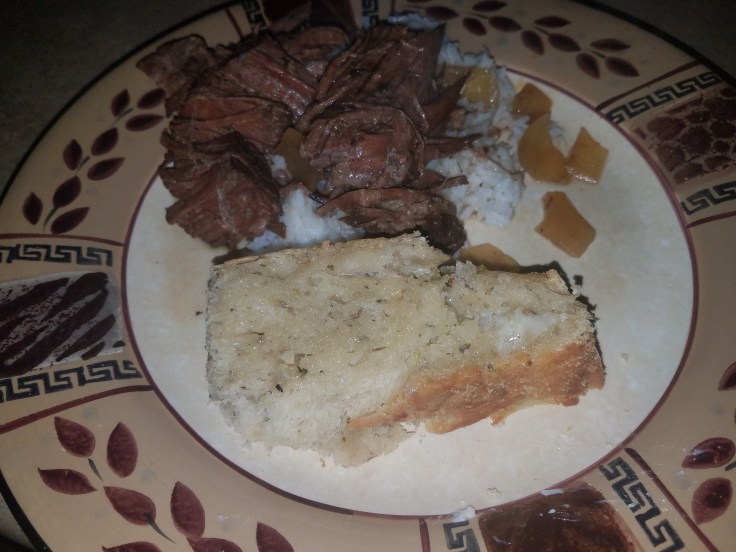
Slice it and spread some butter or olive oil. It’s whatever you want to do at this point!
I made pot roast that night so it was super useful at sopping up juices from it! The finished product looks so unbelievably sexy I tell ya. The herbs and garlic really shine through in this recipe! I mean you can really taste them! The crust is crispy and the bread moist and fluffy!! I guarantee your family will love it. I know my boys did!
**Peep Lil Rocs stalker hand**
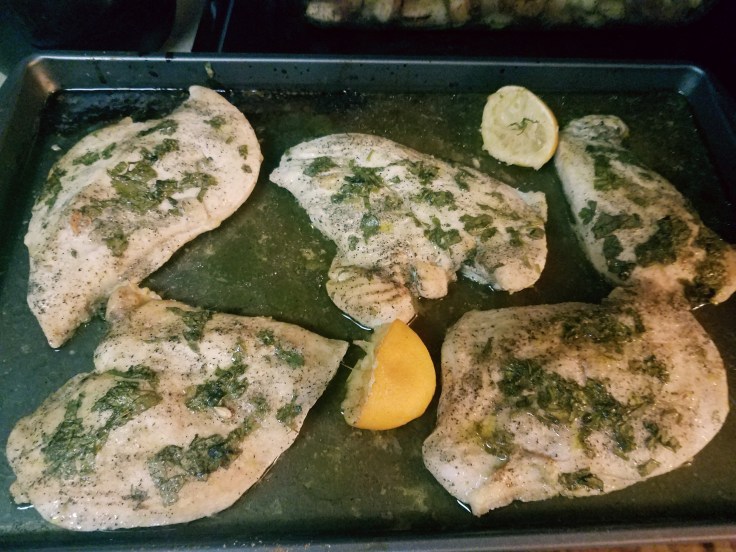
Ingredients:
2 lbs of split chicken breasts
garlic powder
sea salt
1 lemon
black pepper
1/2 cup of chopped fresh cilantro
1/2 cup of olive oil
Goya Adobo All Purpose Seasoning
1/4 cup of Mirin (Japanese sweet rice wine)
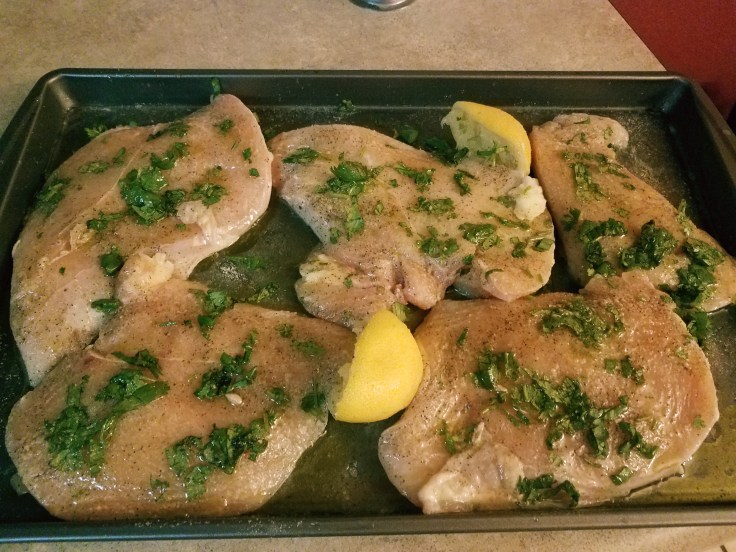
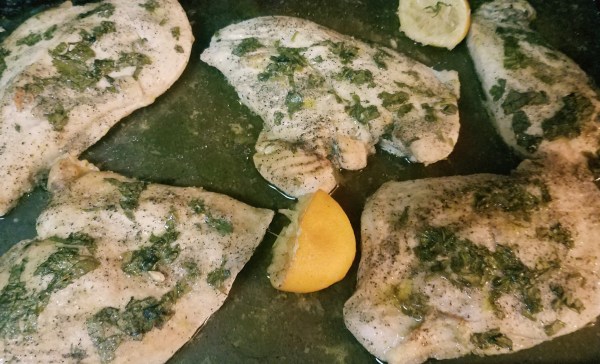
Preheat oven 350 degrees. While it is heating up put all the chicken pieces in a large mixing bowl. Pour in olive oil and Mirin. Next roll a lemon back and forth on your counter applying pressure. This will make it easier to squeeze the most juice from it. Cut it in half and squeeze both halves all over the chicken and toss them with spatula. This is to make sure the chicken has been coated evenly. Then place chicken on a non-stick pan pour any left over juice over the meat. Season each side to taste with garlic, pepper, sea salt, and Adobo. I was very liberal with it. Lastly sprinkle the chopped cilantro over top the each chicken breast and garnish with the two halves of lemon.
I set my timer for 45 min to start. Keep in mind my chicken breasts were huge like OMG thick pieces! (Dang mutant chickens) After the 45 mins I checked it by cutting it with a knife and gave it 10 more mins and it was done. So you may have to adjust time based on if you have thinner/thicker pieces. It was moist, flavorful and best of all NOT overcooked!
**I say this cause no matter how good you season chicken breast if you overcook it and it’s dry everyone’s going to think it’s trash. Lmaooooooo sorry but it’s true…